Showing posts with label colors. Show all posts

March 15, 2013

DIY wedding invitations: Envelope liners

My wedding invitations were partially DIY;  I didn't want to do a entire DIY project from scratch but I definitely wanted to add a lot of customizations to make it as unique as I could with the amount of free time I had available to me.  The complete invitation suite did involve a lot of mini projects and the first of them was the envelope liners.

I ordered my invitations online and they did have the option of ordering envelopes that were already lined with colored paper.   I could have just bought envelopes that were already lined but the styles I liked were way too expensive and the styles that were within my budget were a bit too generic for my liking. Envelope liners are not really a big deal and most guests might not really notice them, but I think they totally change the look of the invitations. For one thing they make the envelope look thicker and feel better quality than clear white envelopes and they just add a little something to the overall inviation suite.  Since my invitations included free white envelopes I decided to attempt to make my own envelope liners. This would save me money and also allow me to choose a liner that fit in better with my vision.


I had seen a roll of wedding gift wrap at my local walgreens in ivory and gold that was just perfect for me. It had cursive font and a repeat print of love sayings.  Exactly what I was looking for.

I bought a couple of rolls of it and brought it home.  Then I measure the inside of the plain envelope to get an idea of what size paper I needed to line the envelope. After much trial and error, I figured it out. Once I had the perfect size of paper, I cut out a template in heavy cardstock and used that as a stencil on the gift wrap.


It was a bit slow and tedious because I have a tiny Fiskars paper trimmer that only cuts about 10 sheets of paper at a time,  but over the course of many days I traced out and cut about 100 liners in printed and plain paper.


Then once I was done cutting, I had to glue the liners into the envelopes. I used the scotch mini glue dot roller which is just awesome. It is probably the best mess-free method of gluing light weight paper.


And this is what the finished product looked like!


October 19, 2012

DIY PROJECT: Paper Cranes

Without really planning it,  I ended up being really inspired to incorporate several Oriental elements in my wedding such as hand fans, hair sticks and of course hanging paper cranes.  I also nearly added Chinese paper lanterns to the list but there was a sudden surge in their popularity so I decided to ditch them at the last minute. I literally was seeing paper lanterns at every wedding I attended for several months in a row!  Anyway I was very intrigued when I came across the Japanese tradition of folding 1000 origami paper cranes for their wedding. I've always loved origami it's such an interesting art form; simple and yet quite complex at the same time.  I quickly became quite obsessed with weddings that featured hanging paper cranes and decided to bravely attempt to fold my own cranes. I knew I would never make it 1000 but decided to at least aim to fold 100 or more.

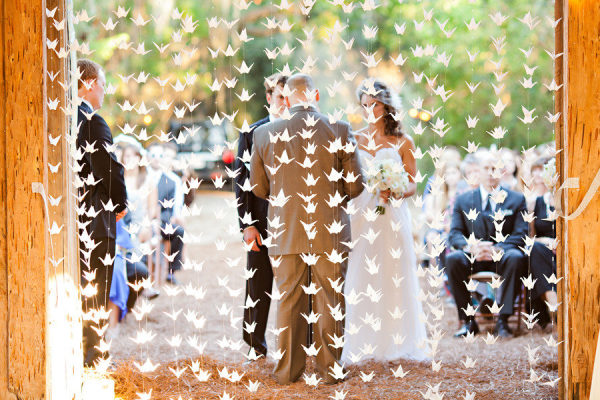
In the end I managed to fold a whopping 200 cranes, although it honestly felt more like 2 billion, but as with all DIY projects, patient diligence pays off! I planned to have the cranes hanging from several locations at the reception, but in the end decided to only use a few strings as a back drop for the head table hanging from a lit arch.

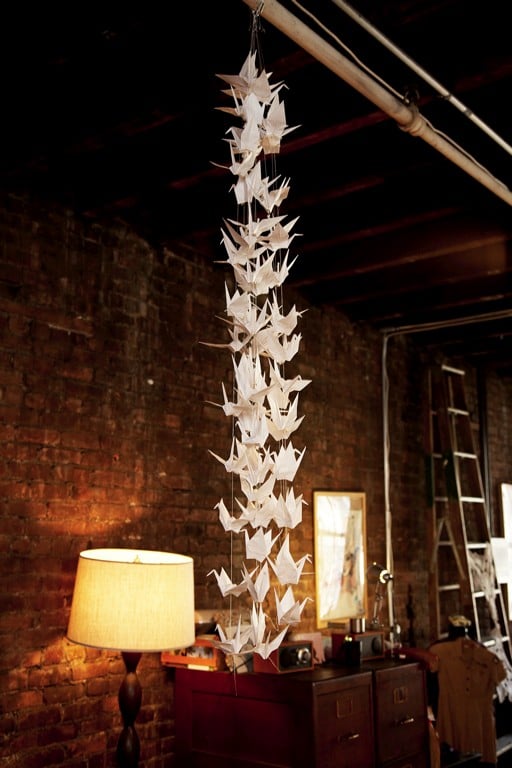
This is the tutorial of how I made my hanging cranes and a picture of the final result. Below my tutorial I attached other inspiration photos of hanging paper cranes.


Picture 4


  1. Choose your paper. Although you can order special origami paper I went with regular card stock.
  2. Cut the paper down to size.  Perfect squares of paper are needed for this project, but I didn't want to pay extra for that size, so I ordered colored paper in regular letter size (8.5" x 11")  and used my fiskars paper cutter to cut it down to size. Tedious to say the least.
  3. Fold the paper into cranes, using a bone folder to get the crease lines perfect. If you don't know how to fold paper cranes, here is a great video that teaches how to fold them
  4. Cut a long length of fishing wire. The length depends on how high up you plan to hang the cranes. I used a 9 ft length of wire, just so I would have extra wire in case I needed it. 
  5. Thread the fishing wire into a large eye beading needle
  6. Tie a knot at the very end of the wire
  7. Push the needle through the center of one bead as if you were making a string of beads
  8. Push the bead to the end of the wire and and secure it by passing the needle through the center of the bead once more. This bead forms the base of the string of cranes
  9. Push the needle through the center of one paper cane and pull the wire all the way until the crane is resting on the first bead from number 8 above.
  10. Thread another bead until it is resting directly on the crane ( If you look really closely at picture 4 above you will see a bead on the top of each crane, sorry for the bad lighting)
  11.  Leave about an 2 or 3 inches of space on the wire and tie another knot
  12. Repeat steps 7 to 12 until you have as many cranes on the wire as y
  13. ou like.


    xoxo


September 11, 2012

Head table or sweetheart table?


Source


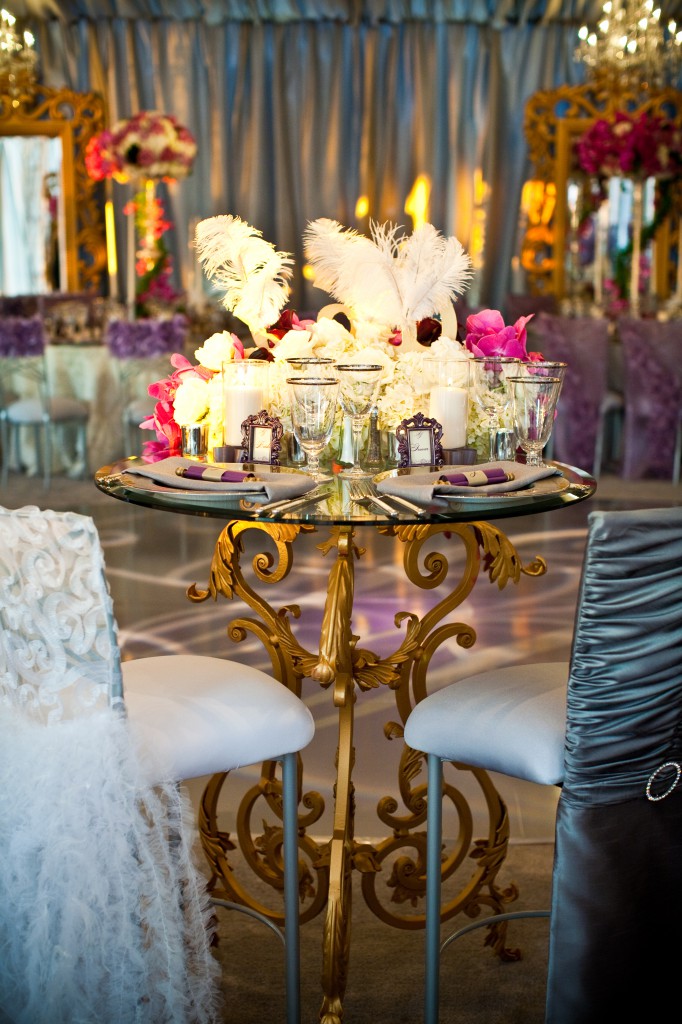
Having a hard time deciding between a head table or a sweet heart table for your wedding reception? Read all about the pros and cons of both here.  I adore the look of sweethearts but love the practicality of a head table. My ideal situation is a head table with a maximum of 8 people including the bride and groom. ( bride + groom + maid of honor + best man + parents of bride & groom) Because honestly what good is it to have a maid of honor if she is sitting on another table from me! The most stylish sweetheart tables are half rounds although some rectangular or round tables can look just as good. The glass sweetheart table above is just too beautiful for words albeit not very practical since the table is tiny! I especially love the bride and groom chair covers; simple, chic and perfect!!!

A happy compromise between a head table and sweetheart would be a sweetheart table sandwich; ie a small sweetheart table with two round tables on either side seating the bridal party and parents.

Draped fabric and table skirts are the most common options for decorating the head table or sweetheart table combined with flowers, lace and even lights. The photos below show many different style options for sweethearts and head tables


Source


Stay stylish!
xoxo

August 16, 2012

Let there be light!


Joshua Dwain Photography


Who knew that something as simple as lighting could play such an important role in the wedding? Light matters, in fact it is far more important than most people realize. The thing is, the only way to capture the memories of your big day is with photography & videography, and both of these depend heavily on lighting. Light has the biggest impact on the wedding decor. Read more about the types of lighting used in weddings here.

The short version of the article goes something like this:

Three main types of lighting = Natural light + Indoor bulb light + Uplights
Using the right light, at the right time, in the right way is crucial!

With each type of lighting, there are a few things to keep in mind and certain common errors to avoid

[1] Natural light


Agnes Lopez


The gorgeous photos above by Agnes Lopez are proof that bride needs at least some photos taken in natural light, to accurately capture the true color, style and details of the wedding garments, make up and accessories.  For outdoor ceremonies, be sure to avoid setting up the seats facing the sun, otherwise the bright light will be directly in is everyone's eyes and no one will be able to get good shot of what is going on, this will also cause shadows to be cast on all the guest photos. Guest photos are a priceless addition to the wedding album, they are often able to capture angles and view points that the professional photographer missed. Visit your outdoor venue at a similar time and season that your ceremony is scheduled for, to get an accurate idea of which direction the sunlight will be facing. Set up the seating in such a way that the guests will have their backs to the sun.

[2] Indoor light.


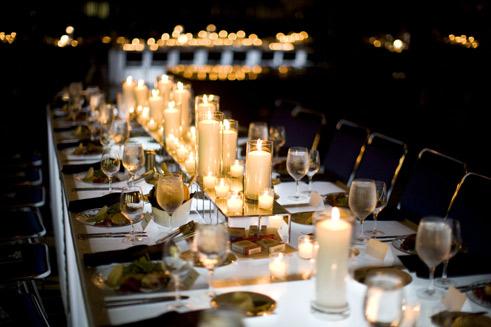
Candles are a popular choice for weddings. They can be a sweet and romantic addition to any space, but only if used properly. Candles are much like flowers; just because they have the ability to be decorative and beautiful doesn't mean they will automatically always look great if not displayed stylishly. I honestly cannot count the number of weddings I have attended with candles drooping drunkenly all over the place, as if they were about to fall right out of their holders. I have actually witnessed a candle tip over and light fire to the table linen!  It is important to choose candles that actually fit in the holder so they stand up straight rather then lean over precariously, this is especially the case with long taper candles.

People often forget that just like other forms of light, candles emit heat. There is nothing worse than sweating to death at a reception surrounded by excessive amounts of candles in a hot poorly circulated space. Always adjust the room temperature  accordingly to match the number of candles lit.

And while we are on the topic of candles, lets talk about scented candles... or maybe lets not. If you love scented candles then thats great, you can buy packs of them and light them in the comfort of our own home, but please do not use these at your wedding. Especially food flavored scents like vanilla or cinnamon. These can become really over powering when many of them are lit in an enclosed space and not everyone wants to be drowned in such strong artificial fragrances. Some guests may have aversions to certain scents and will be uncomfortable sitting at such a table.


[3] Uplighting


Sekweddinglighting


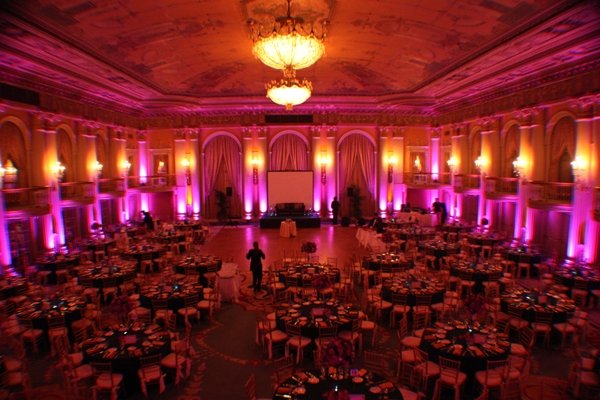
Uplights can be uber stylish and very chic, and have the power to totally transform the room, but they really have to be used in the right way, otherwise all the pictures will have a freakish glow to them as though you were trying to "phone home" from another planet. These are also best used in moderation; exaggerated amounts of uplights in various colors will just look cheap and childish.
A lot of people choose to combine diy uplights with christmas lights. I can't tell you why they do this because I barely understand it myself. Less is always more, so there is no need to combine multiple types of light in one small space. 
Many people also believe it is stylish to choose uplights in the same colors as their wedding palette, so blue lights to match blue bridesmaids dresses, blue eyeshadow, blue table cloths, blue ties...  Think about it logically, if you are already dressed in blue why do you need blue lights to tint everything the same color that you are already wearing?
Uplights are best saved for night time, and are best for the reception when everyone is in the party mood. Using them during the day or during the ceremony will just rob you of natural looking pictures and waste the perfect natural light you had available to you.


Some of the main things to keep in mind when choosing wedding lighting are as follows

-Where natural light is available take advantage of it! Remember it is free and flattering!
-For an indoor ceremony, arrange to take at least some of the photos outside in natural light
-Only use uplighting that is professionally installed, and isnt overly matchy with the wedding colors


xoxo


August 2, 2011

The color blush...

Waltz by Monique Lhuillier


For years brides have religiously adhered to the white gown rule; which gradually included gowns in ivory, cream and even champagne but for upcoming seasons you can expect to see more brides walking down in the aisle in blush colored gowns.
The funny thing about colors is how important it is to get the right shade!!!  Blush is a specific range of shades of pink with peachy undertones, it is not the same as Baby pink, pastel pink, or bubble-gum pink, or any other pink for that matter...


The beauty of blush is that the color is barely there, it is soft and feminine without being too girly or childish and best of all it would be an unexpected surprise for your guests as most of them would be expecting you to walk down the aisle in white/ivory.  Read more about blush gowns here

Here are my favorite blush gowns from the 2011 and 2012 collections

Vera Wang WHITE

Susannah by Badgely Mischka


Dew drop by Claire Pettibone


                                                               Katharine by Sottero & Midgley 

                                                                 Cherise by Ines Di Santo


                                                                     Freya by Rivini


                                                                                             Candy by Monique Lhuillier

                                                                        Watters
Romona Keveza Legends


Evangeline by Rivini


xoxo


February 22, 2011

Color outside the lines!


Wedding inspiration in unexpected places was the title of my most recent article, to let brides know that sometimes the best places to find great wedding ideas aren’t even remotely related to anything bridal such as the hardware store. Read more here...

And while we are on the subject of colors, another excellent source of inspiration is nature. There are tons of breathtaking color ideas all around us that most of us pay little attention to, such as;

The awesome swirls of pinks, purples and orange in the sky at sunset


The vibrant blue and green of a peacock’s feathers


The multidimensional honey, caramel and latte tones of the grains of sand at the beach, and the list goes on and on..

Here are some more fun and fabulous color combos

Lime &  Charcoal


Red &  Lilac


Yellow & Pink


Stay stylishly colorful!!